Unlocking Creativity with Laser Cut Files for Animal Designs
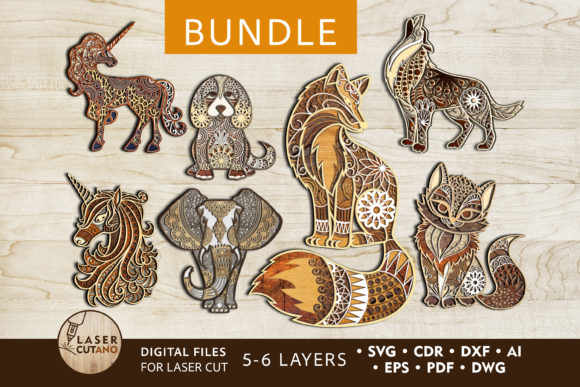
Laser cut files have revolutionized the way we approach design and fabrication, especially when it comes to intricate animal shapes. These digital templates offer a versatile and precise method for bringing artistic visions to life using laser cutting machines, CNC routers, or other compatible tools. With the Animals Bundle of multilayer layouts, you gain access to a creative resource that allows you to transform your home decor into a stunning visual experience.
What Are Laser Cut Files?
Laser cut files are digital blueprints used by laser cutting and engraving machines to produce detailed designs from various materials. These files define where the machine should cut, etch, or shape the material based on vector paths. When applied to animal-themed art, they allow for complex outlines and layered structures that can be easily assembled into decorative pieces.
Why Choose Multilayer Layouts?
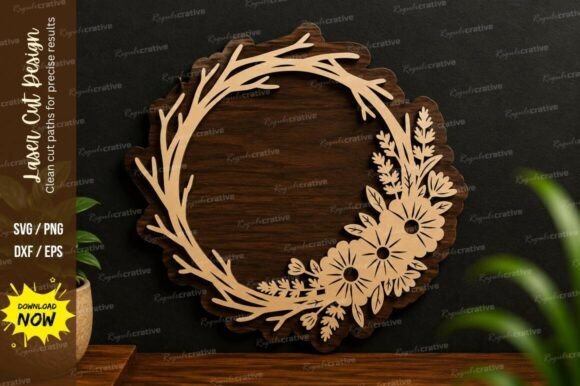
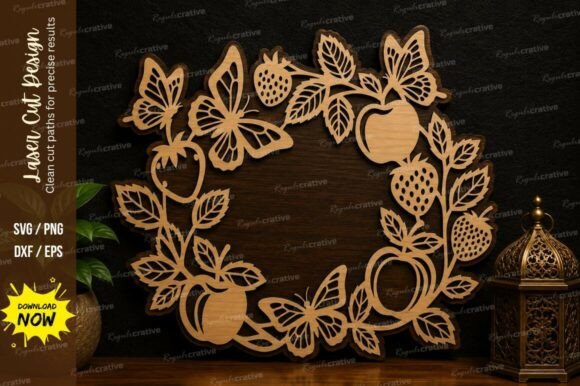
The Animals Bundle is designed as a set of multilayer layouts, typically consisting of 5-6 layers per design. This format enables depth and dimension in the final product, creating a visually striking effect. Each layer corresponds to a specific part of the design—such as facial features, body contours, or background elements—that can be individually crafted and then combined to form a complete piece.
Supported File Formats and Compatibility
To ensure flexibility and ease of use, this bundle includes files in multiple formats: .AI, .SVG, .DXF, .DWG, .CDR, .EPS, and .PDF. These formats cater to different software preferences and machine types:
- .AI (Adobe Illustrator): Ideal for designers who need to modify vector elements before cutting.
- .SVG (Scalable Vector Graphics): A web-friendly format that maintains quality at any size.
- .DXF and .DWG: Commonly used in engineering and CAD software, suitable for CNC machines.
- .CDR (CorelDRAW): Perfect for users of CorelDRAW who want to adjust or animate parts of the design.
- .EPS (Encapsulated PostScript): Great for high-resolution printing and professional applications.
- .PDF: Useful for viewing and printing, but not recommended for direct cutting without conversion.
All files are compressed into a single .zip folder, which users must extract before accessing individual designs. This ensures efficient storage and easy transfer across devices.
Recommended Materials and Thickness
One of the strengths of laser cut files is their compatibility with a wide range of materials. For the Animals Bundle, the following materials are ideal due to their ability to hold fine details and structural integrity:
- Plywood
- MDF (Medium-Density Fiberboard)
- Acrylic and Plexiglas
- Metal – for more advanced users seeking industrial aesthetics
- Cardboard and Paper – excellent for lightweight, temporary, or experimental projects
The recommended thickness for wood-based materials is between 3mm and 6mm (approximately 1/8 inch to 1/4 inch). This range ensures that the cuts are clean and that the layers remain manageable during assembly. While it’s possible to scale up the design, reducing its size may affect thin or delicate elements, so careful consideration is needed when adjusting dimensions.
Practical Use Cases for Laser Cut Animals
Animal-themed laser cut designs serve both functional and decorative purposes. Here are some popular applications:
- Wall Art: Hang completed animal silhouettes or layered compositions on walls to add texture and visual interest. The multilayer aspect creates an illusion of depth, making even simple animals appear dynamic.
- Timber Framed Displays: Mount the finished pieces within wooden frames to create unique wall hangings or room dividers. This method is particularly effective for adding a rustic or modern touch to interior spaces.
- Educational Tools: Teachers and educators can use these designs in classrooms to explain anatomy, symmetry, or environmental themes through hands-on crafting activities.
- Commercial Applications: Business owners can incorporate laser-cut animal art into retail displays, branding elements, or custom signage to attract attention and convey a theme.
- Hobby Projects: Crafters and DIY enthusiasts enjoy experimenting with colors, textures, and mounting techniques to personalize each creation.
Workflow and Assembly Tips
Creating a finished product from laser cut files involves several key steps:
- Unzip the file and select the appropriate format for your machine and software.
- Prepare your material according to the specified thickness and type.
- Cut each layer carefully, ensuring that the machine settings are adjusted for optimal precision.
- Paint or finish each layer before gluing them together. This step enhances the visual appeal and makes color corrections easier than after assembly.
- Assemble the layers using strong, clear glue to maintain the structure's stability and aesthetic clarity.
Each step plays a vital role in the final outcome. Skipping the painting phase or using improper adhesives can lead to uneven visuals or weak construction. Additionally, proper ventilation and protective gear are essential when working with materials like acrylic or metal, especially during the cutting process.
Customization and Creative Freedom
A major advantage of laser cut files is the ability to customize. Artists and designers can tweak colors, add additional layers, or integrate other components such as LED lighting or interactive elements. For example, a layered lion silhouette could be enhanced with painted fur patterns or mounted with motion sensors for subtle movement effects.
This level of customization encourages innovation. Educators might create a series of animal silhouettes to represent different species in a science project, while hobbyists can experiment with abstract interpretations or combine multiple animals into a collage-style artwork.
Design Considerations and Limitations
While laser cut files provide incredible versatility, there are certain considerations to keep in mind:
- Material properties: Not all materials respond the same way to laser cutting. For instance, acrylic tends to melt slightly around edges, requiring post-processing to achieve smooth finishes.
- Machine calibration: Ensuring your laser cutter or CNC router is properly calibrated is crucial for accurate results, especially with intricate animal designs.
- Thin elements: Some designs feature delicate lines or small components. Reducing the overall size can compromise these elements, potentially leading to breakage or distortion.
- Layer alignment: Precise positioning of each layer is necessary to maintain the intended look and feel of the design. Using jigs or guides during assembly can help achieve perfect alignment.
By understanding these limitations, users can plan ahead and optimize their workflow to avoid common pitfalls and enhance the final product's quality.
Applications in Different Industries
Beyond home decor, laser-cut animal designs find relevance in various fields:
- Architectural Design: Used in partitioning, ceiling installations, or as part of larger interior design schemes.
- Event Decor: Custom animal motifs can be integrated into event backdrops, invitations, or centerpieces.
- Product Manufacturing: Businesses can produce branded merchandise like keychains, coasters, or personalized gifts featuring laser-cut animals.
- Art Exhibitions: Contemporary artists often utilize laser cutting to create large-scale installations or mixed-media works that explore themes of nature and identity.
These examples highlight how laser cut files bridge the gap between traditional craftsmanship and modern technology, enabling new forms of expression across industries.
Environmental and Ethical Implications
Using laser cut files for animal designs also opens up discussions about sustainability and ethical representation. Choosing recycled or locally sourced materials like MDF or cardboard can reduce the ecological footprint of your project. Moreover, representing endangered or culturally significant animals requires sensitivity and awareness. Artists are encouraged to consider the message behind their work and align it with responsible practices.
Getting Started with Your Laser Cut Animal Project
For beginners, the process of working with laser cut files can seem daunting, but it's actually quite straightforward once you understand the basics. Start by selecting a design from the Animals Bundle that resonates with your vision. Next, determine the material best suited for your project based on budget, desired durability, and visual style.
Import the file into your preferred software, review the layers, and make any adjustments if necessary. Then, load the material into your machine and execute the cut. Afterward, assemble the layers with care, applying paint or stain to each piece before gluing. Finally, mount or display your creation, and admire the result of your effort and creativity.
Tools and Software Recommendations
To maximize the potential of laser cut files, consider using the following tools and software:
- Adobe Illustrator or CorelDRAW for editing .AI or .CDR files
- AutoCAD or SketchUp for working with .DXF or .DWG files
- Inkscape as a free alternative for SVG editing
- Laser cutting software specific to your machine brand for processing and optimizing the design
These programs allow for detailed manipulation, ensuring that every line and curve is exactly as envisioned before sending the file to the cutting machine.
Community and Inspiration
Many creators share their laser-cut animal projects online, offering inspiration and guidance for others. Platforms like Pinterest, Instagram, and YouTube showcase a variety of styles—from minimalist black-and-white silhouettes to vibrant, multi-colored masterpieces. Engaging with these communities can help expand your ideas and improve your technique over time.
Additionally, workshops and tutorials are available for those looking to refine their skills. Whether you're learning how to adjust file sizes or mastering the art of layering, these resources can be invaluable for achieving professional results.
Conclusion
Laser cut files for animal designs open up a world of possibilities for professionals, hobbyists, and everyone in between. With the right tools, materials, and understanding of the workflow, anyone can bring these elegant and intricate designs to life. From educational aids to commercial products, the Animals Bundle exemplifies how digital fabrication can merge functionality with beauty, empowering users to craft meaningful and visually captivating works.